Icons
Table of Contents:
Icon Fonts #
In our theme we use Icon Fonts for the icons.
A major advantage of why we used Icon Fonts is they scale very nicely, they looked nice for retina displays, they are lightweight compared to an images, it’s possible to change their color and style them using CSS.
We provide Infolio Default Icon Pack which is included in the theme by default.
If default pack is not enough you can add your own icons and create Custom Icon Pack.
Default Icon Pack #
Default Icon Pack available in the theme by default.
To use icons from default pack:
- Go to Infolio Default Icons Pack page
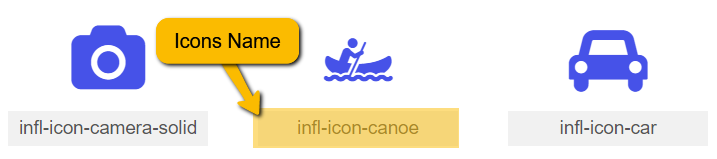
- Find icon you want to use and copy Icon Name.
For example if you want to use canoe icon the icon name will be infl-icon-canoe
- Paste Icon Name into the appropriate input field in the WordPress admin.
Read in more details how to use icon name’s in WordPress admin here.
Custom Icon Pack #
If you want to add custom icons you will need to activate Infolio Child theme and have FTP, cPanel or other access to your project files as you will need to generate your custom icons and upload generated folder into the Infolio Child theme.
Step 1: Activate Child Theme
This helps your changes remain intact after parent theme updates. Read about Child Theme and how activate it here.
Step 2: Create Custom Icon Pack Project
Our Custom Icon Pack project will be created using IcoMoon.
IcoMoon allows you to quickly browse and search for the icons you need. You can download these icons, do some basic editing, import your own icons and make icon fonts.
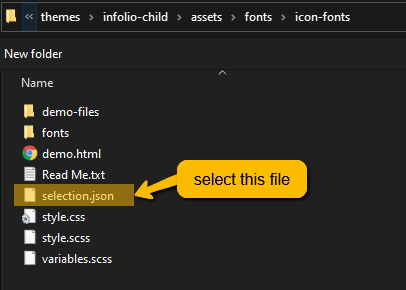
- Download selection.json file
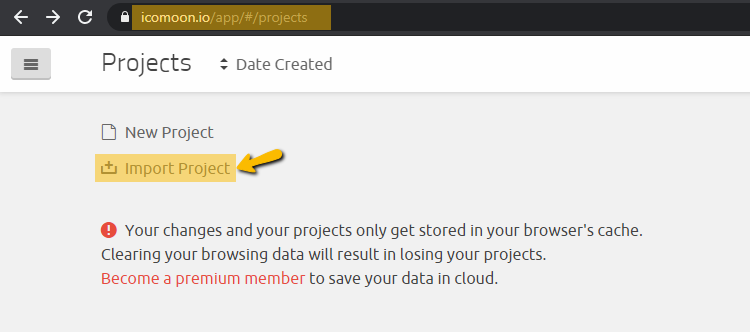
- Head over to https://icomoon.io/app
-
Click on the Import Project button and upload selection.json file which you just downloaded in the point 1.
- After file upload your Custom Icon Pack project will appear in the browser window.
Click on the Untitled Project area and rename your project for example to Infolio Custom Icons.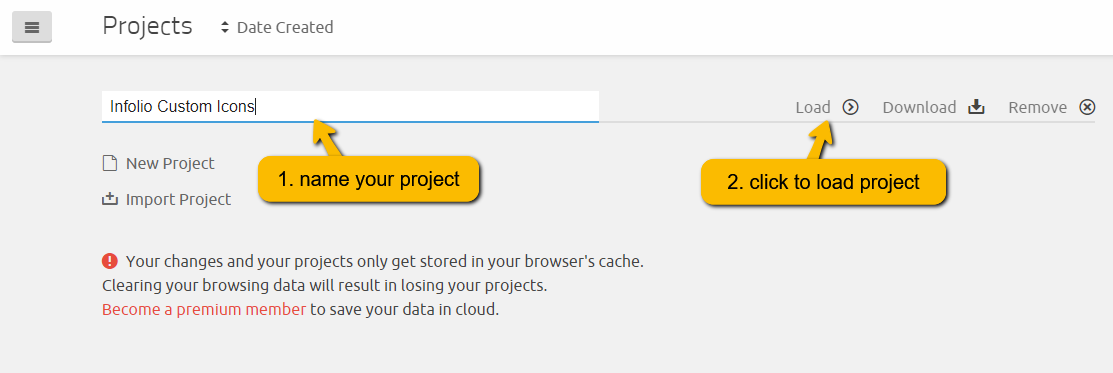
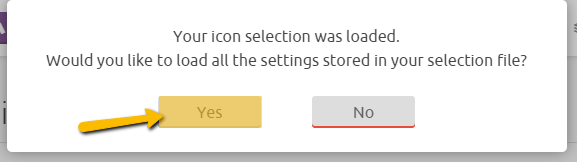
-
After clicking on the Load button in the opened popup window click Yes button (this is very important, to not loose our project settings).
-
Congratulation you created your Custom Icon Pack project if you see this view.
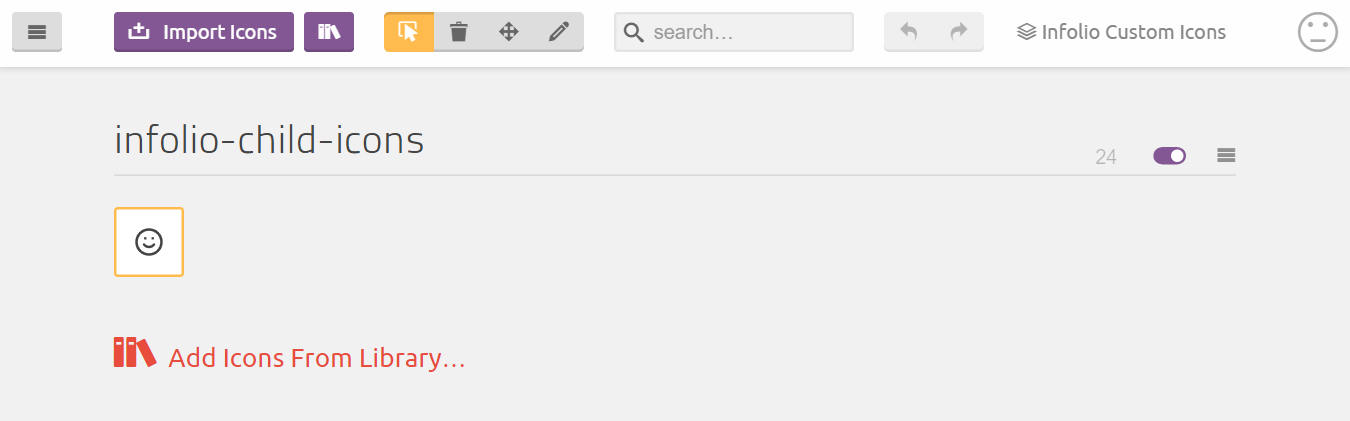
Now it’s time to add your icons into Custom Icon Pack project.
Here are the 3 possible ways to do that:1. Add icons using search
2. Add icon libs (Font Awesom, Material Icons, Entypo, etc.)
3. Add your own unique icons using SVG or PNGPlease examine all of this methods to figure out which one is more convenient for you.
Use one of them or mix them together depending on your needs.
Each method explains how to add icons to your pack.After adding icons go back to this point to continue »
Step 3: Download Custom Icon Pack Project
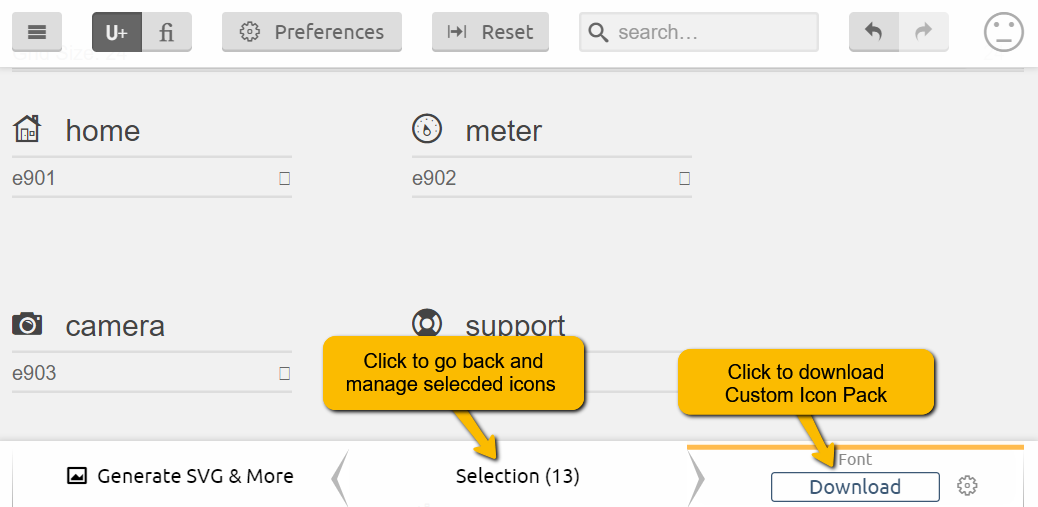
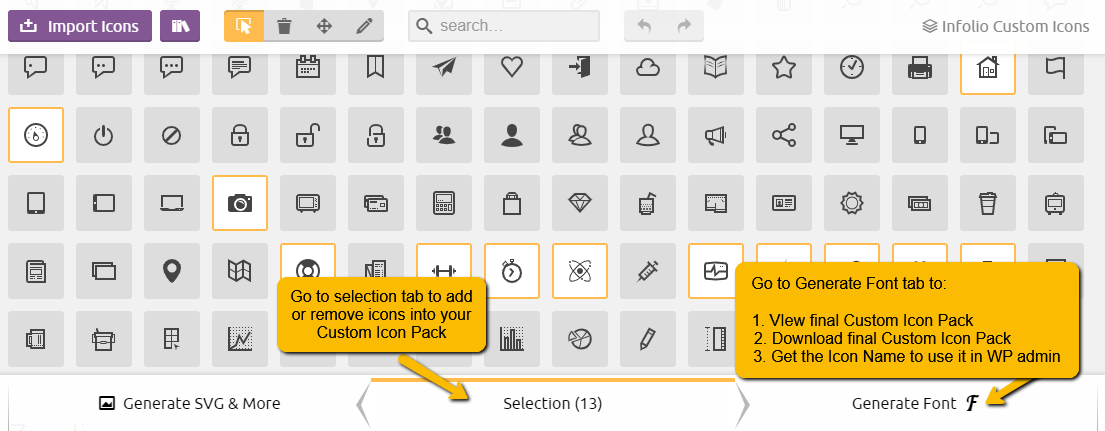
After adding icons in the Custom Icon Pack project click on the Generate Font button at the right bottom corner of the window.
![]()
In the opened window you will see all icons added into Custom Icon Pack.
In case if you want to continue managing icons click on the Selections area to go back (see image above).
If your Custom Icon Pack is ready and you don’t want to add or remove icons there anymore then click on the Download button and you will get infolio-child-icons.zip file archive.
This archive contains all the necessary information and files about created Custom Icon Pack and it will allow to make changes on the already created Custom Icons Pack as many times as you need later (read more here).
In the next step you will need to upload downloaded files into your Child Theme.
Step 4: Move Custom Icon Pack Into Your Child Theme
- Using FTP, cPanel or any other server access go to your Child Theme folder: wp-content/themes/infolio-child
- Open icon pack folder in Child Theme: assets/fonts/infolio-child-icons
- Overwrite whole infolio-child-icons folder content with the infolio-child-icons.zip extracted files

Now the Custom Icon Pack is already on your site and you can use new icons.
Step 5: Get Icon Name
It is possible to get the Icon Name in two ways
OPTION 1:
-
From the Generate Font tab find the icon you want to use hover on it and press on the Get Code link

-
From the opened popup copy the Icon Name.
For example if you want to use health icon the icon name will be infl-child-health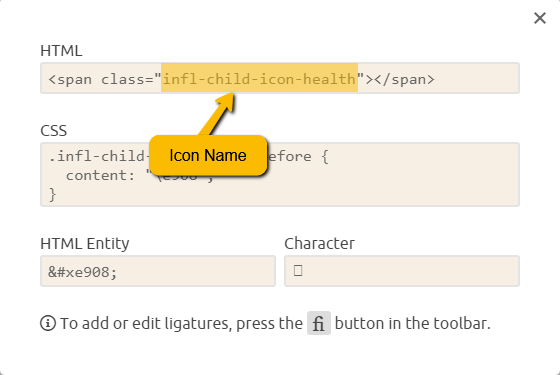
-
Paste Icon Name into the appropriate input field in the WordPress admin.
Read in more details how to use icon name’s in WordPress admin here.
OPTION 2:
-
Click and open demo.html file from the downloaded infolio-child-icons.zip folder ( you can do this on your local pc )
-
In the opened page find icon you want to use and copy the Icon Name.
For example if you want to use camera icon the icon name will be infl-child-icon-camera
-
Paste Icon Name into the appropriate input field in the WordPress admin.
Read in more details how to use icon name’s in WordPress admin here.
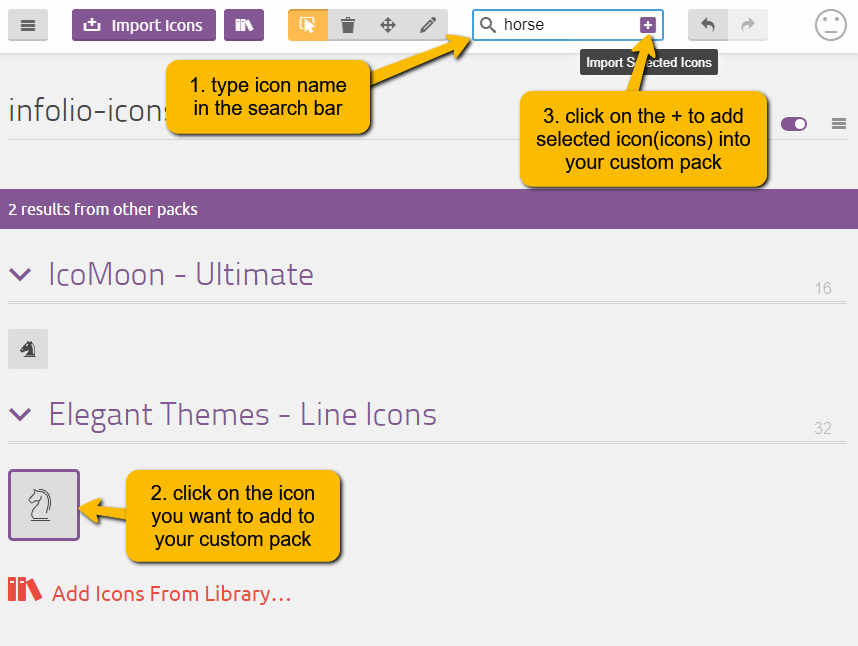
Add icons using search #
For example if you want to add an horse icon do following steps:
- Type icon name in the search bar
- You can simply click on an icon cell to select or deselect it. You can select more than one icon.
- Click on the + button inside the search bar to add selected icons into your custom pack.
Search method allows to have small icon pack choosed from different Icon Libraries (for example horse icon form one lib, queen icon from another lib)
Search method allows to add in your custom puck the exact icons that you need to use for your project without including whole Icon Libraries. this is a good solution for your site performance as libraries contain a lot of icons but usually you need to use few of them.
IcoMoon provides both free and premium icons. In general free icons totally covers all requests.
Add Icons From Library #
If you want to add full Icon Library or choose some subset from exact Icon Library do following steps:
- Click on the Icon Library button

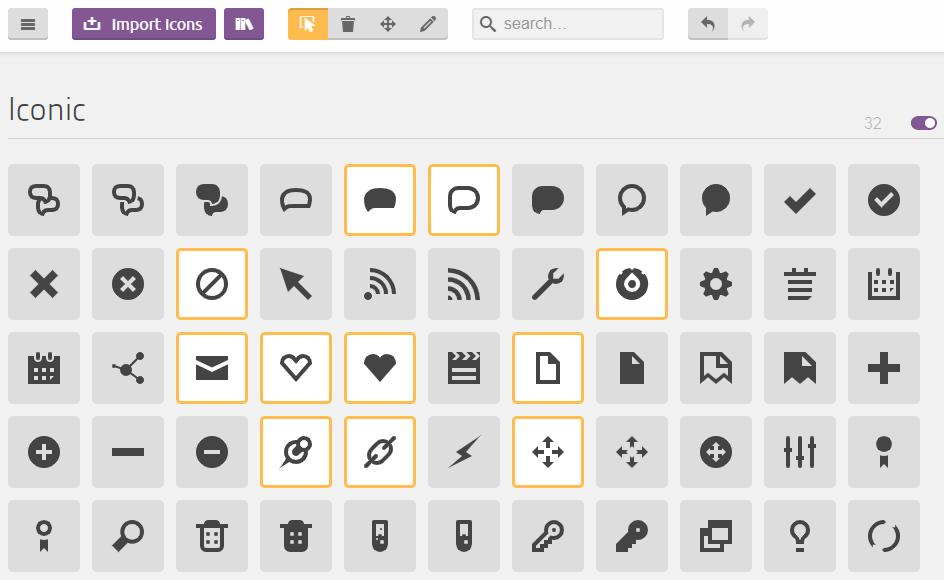
- Choose icon library and click Add button
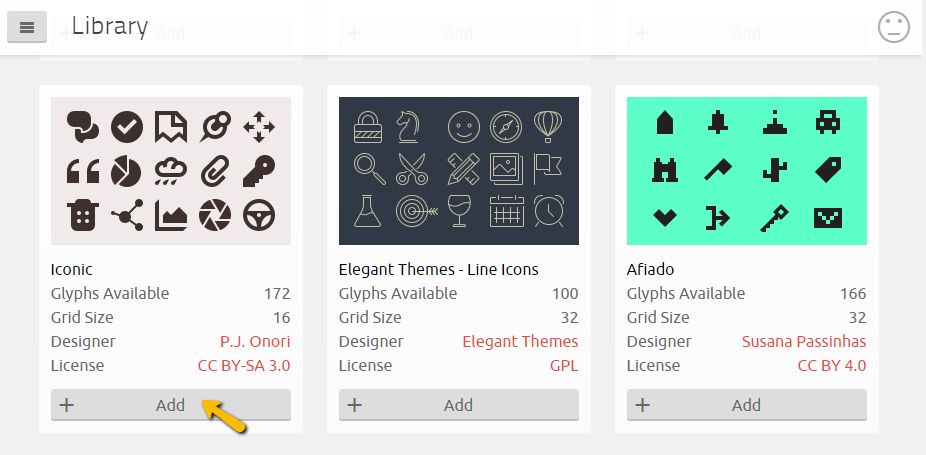
- You can simply click on an icon cell to select or deselect it. You may also drag to select a group of icons. If you click on an icon cell to select it, and then hold down the Shift key when selecting another icon, all the icons in between these two icons will be selected.
Icons all over the site will have same style and size without any visual “glitches”.
Icon Libraries contain a lot of icons but usually you need to use few of them. We do not recommend using full Icon Library for a site performance reasons.
IcoMoon provides both free and premium Icon Library’s.
Add Icons using SVG or PNG #
Use this method if you want to add unique icon which not exist in the icon packs or you can’t find your icon in the free packs and don’t want to use premium ones.
- Click on the Import Icons button
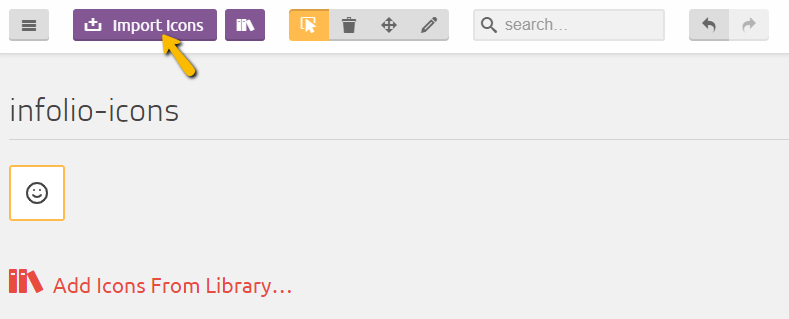
- You can upload one or more SVG icons
- You can simply click on an icon cell to select or deselect it. You can select more than one icon.
If you don’t have SVG icons, you can use PNG to SVG convertor tools ( for example https://picsvg.com )
IcoMoon app ignore strokes when generating font. Read the doc if you will have problem with stroke SVG icon.
Manage Custom Icon Pack Project #
Created Custom Icon Pack project and added icons will be stored in your browser’s cache. So if you can always made changes on your Custom Icon Pack.
Go to https://icomoon.io/app/#/projects to access your project and press Load button.
From the bottom tab bar you can navigate between icon Selection and Font Generation pages:
Remember that clearing your browsing data will result in losing your project, but you can recreate it any time by uploading your selection.json from your Child Theme.
Firs time you use our provided selection.json file (which included necessary settings for custom pack creation), after that you should use your selection.json file (to not loose your added icons) from last downloaded infolio-child-icons.zip archive (which is also uploaded in your Child Them ).
Custom Icon Pack creation and infolio-child-icons.zip generation described here.
How Use Icons In WordPress Admin #
- Copy appropriate Icon Name from the Default Icons Pack or Custom Icon Pack
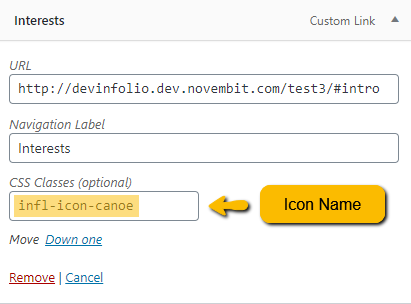
- Paste Icon Name into the appropriate input field in WordPress admin. For different site parts this input fields located in different places, there are listed below:
For example if you want to use canoe icon and your Icon Name is infl-icon-canoe or your custom Icon Name is infl-child-icon-health
Left Sidebar Navigation
Go to Dashboard » Appearance » Menus choose menu where Display Location » Left Sidebar
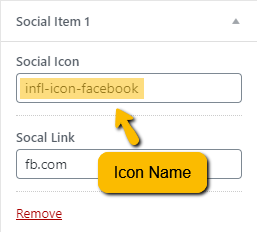
Social Icons
Go to Dashboard » Appearance » Customizer » Social Settings
Skills
Coming Soon
Contact
Coming Soon
References
Coming Soon
Services
Coming Soon
Statistics
Coming Soon