Reactions
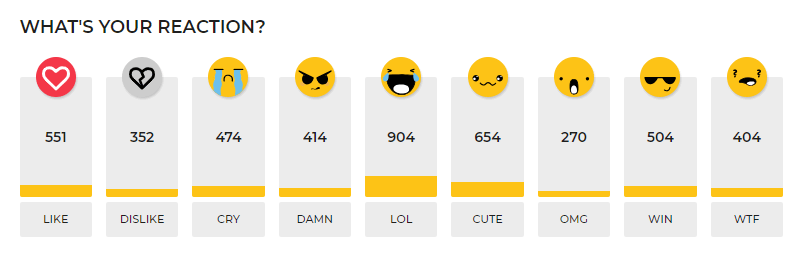
Reactions are a simple way for users to express their reactions and feelings to a post.
First of all make sure that you have reactions in Dashboard ▸ Posts ▸ Reactions. You can also create, edit or delete reactions from there. You need to have created Reactions there for being able to add in menu or show under the post.
Simply, reaction is more advanced voting system when every click to any reaction give 1 Point. Here is what you can control from Customizing ▸ Extras ▸ Posts Reaction System:
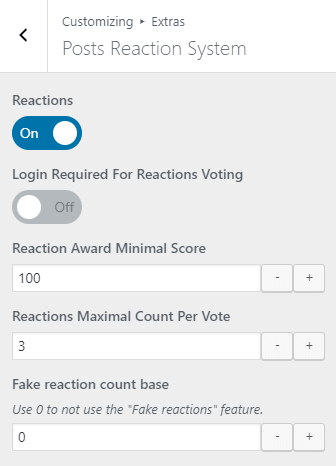
- Reactions
- On or Off – means enable or disable global voting with reactions from the bottom of the post, disabling here doesn’t mean they will be disabled in Badges Menu. For Disabling Badges Menu go to Customizing ▸ Header ▸ Layout ▸ Badges Menu Location = None
- Login Required For Reactions Voting
- On or Off – when On that means only registered and logged-in users can vote with reactions.
- Reaction Award Minimal Score
- Numeric Value field – this means if value set as 30 (points) then the specific reaction will appear as a Badge on Post Thumbnail only when that reaction will collect 30 points
- Reactions Maximal Count Per Vote
- Numeric Value field – this field stands for count of votes per post by one user. That means that one user can click only once on 3 reactions for one post
- Fake reaction count base
- Numeric Value field – this field allow to show fake count instead of the real score per post
Please note that 1 click on 1 reaction are equal to 1 point.
1 click = 1 point on 1 reaction
By default voting rules are following:
Signed in users can vote only once for the same post. Not signed in users can vote once within 24 hours, after that 24 hours they can vote again on the same post.
-
# Why I can’t see all menu items in left Menu Bar?
You need to make sure that all the Menu items activated from Screen Options
From Dashboard▸ Appearance▸ Menus click on the “Screen Options” button on top right corner and make sure all check-boxes are marked.

In this way you can add icons or labels to Menu and have in Menu categories, posts, pages, reactions, ranking and other taxonomies.
-
# How to show or hide Reactions at the Bottom of the post?
There are 2 ways to show or hide reactions in Posts.
- By this way you can Disable reactions Globally on all posts. Go to Customizing ▸ Extras ▸ Badges ▸ Reactions = Off. Please note that disabling Reactions here doesn’t mean they will be disabled in Badges Menu.
- By this way you can just hide Reactions from Posts page and not disable. Go to Customizing ▸ Single Post ▸ Main ▸ Sections where you can show or hide or change position of the reactions.
-
# How to Disable Badges Menu in Header?
For Disabling Badges Menu go to Customizing ▸ Header ▸ Layout ▸ Badges Menu Location = None
-
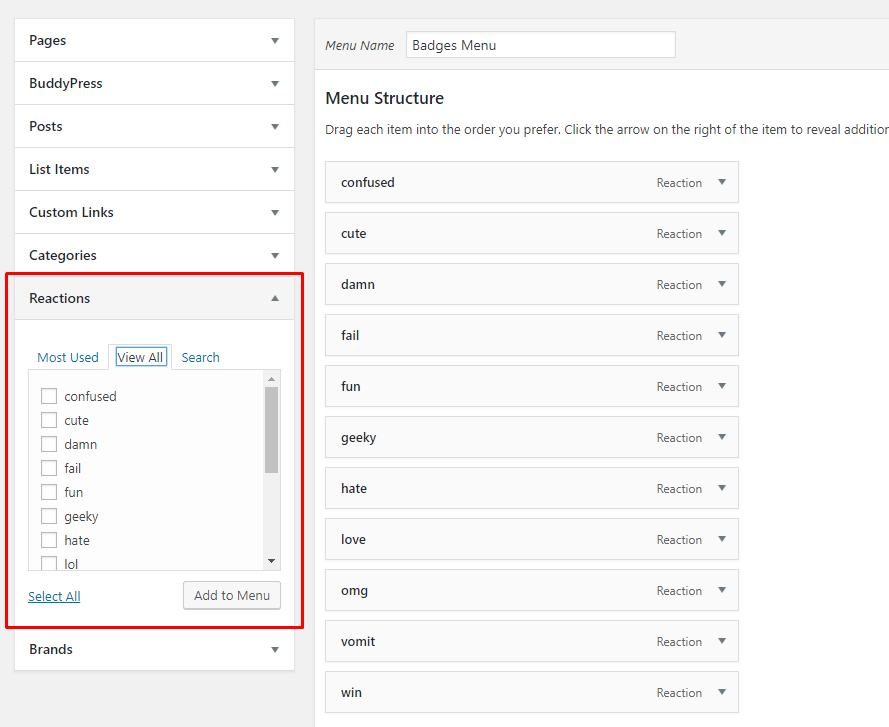
# How to add reactions in Menu?
-
# How to add custom Reaction?
Beside predefined reaction icons pack, you can use your own custom reactions. For that you’ll need to use FTP
- Use FTP client, login to the server where your WordPress website is hosted
- Navigate to the /wp-content/themes/boombox ( or boombox-child )/reactions/ directory under your WordPress website’s root directory
- Upload your own set to that directory on remote server
After this steps you will be able to use custom reactions
Please note: Icons format should be .svg, so emojis will look good also on retina displays. Optimal size for reactions should be 150×150 px.
-
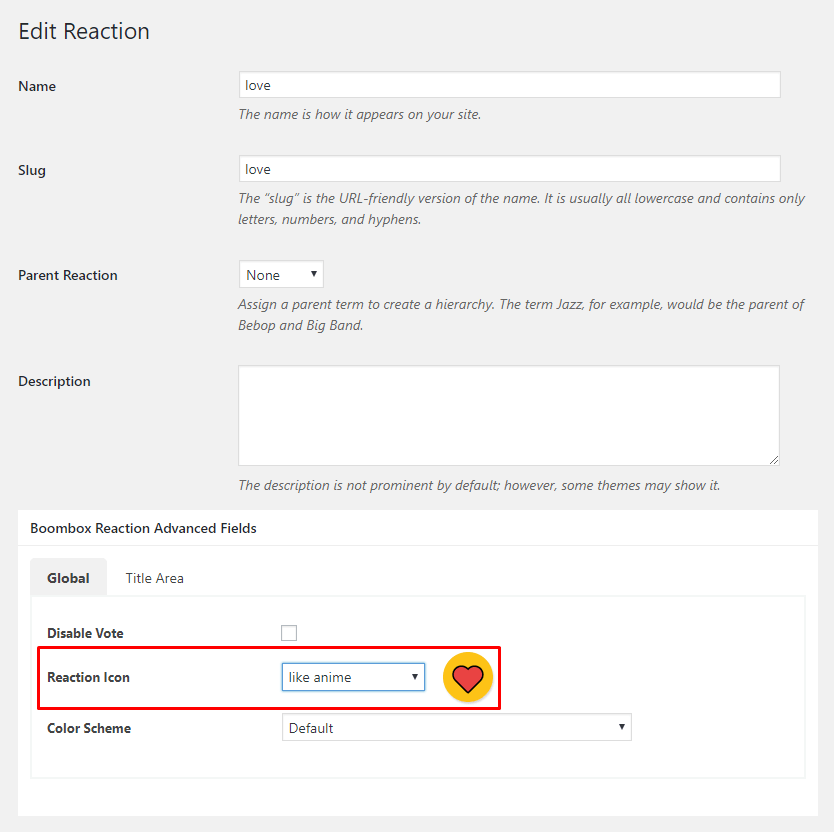
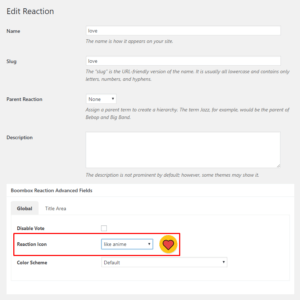
# How to add icon to Reaction?
Go to Dashboard ▸ Posts ▸ Reactions ▸ Edit reaction and scroll down to Reaction icon, where you can select Icon from dropdown icons list.
-
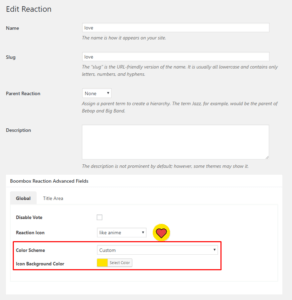
# How to change color for specific Reaction?
Go to Dashboard ▸ Posts ▸ Reactions ▸ Edit reaction and scroll down to Color Scheme where you can select color from color-picker.