Header
The Header is including the next positions:
- Top Layer
- Bottom Layer
- Featured Labels
- Badges ( read more▸ )
- More Button
- Post Strip
You can change Header components position, enable or disable header elements, change color and font and all that are very flexible and easy to use because of the well thought Customizer Options. For managing Header go to WordPress Customizer ▸ Header
You will see 5 main sections where concentrated global options for Boombox Theme header.
Let’s see what yo can change and control under these sections.
Layout #
- Logo Position
- choose in what layer show the logo: Top layer or Bottom layer
Top Layer

- On/Off switcher
- Top Layer can be disabled or enabled
- Composition
- is the options which show the way how you can organize header components. What you need to know is that you can have components on Left side which is L and on Right side which is R. Pay attention as well to Logo Position, Menu position and Ad.
- Width
- Top Layer Width can be Boxed or Full Width
- Height
- Top Layer Height can be Small or Medium or Large
To find out how to upload Logo please read this article.
Bottom Layer
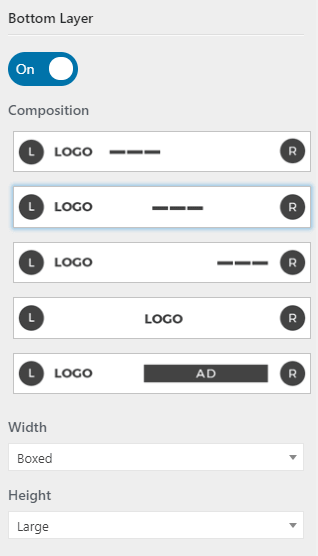
- On/Off switcher
- Bottom Layer can be disabled or enabled
- Composition
- is the options which show the way how you can organize header components. What you need to know is that you can have components on Left side which is L and on Right side which is R. Pay attention as well to Logo Position, Menu position and Ad.
- Width
- Bottom Layer Width can be Boxed or Full Width
- Height
- Bottom Layer Height can be Small or Medium or Large
Components Positions
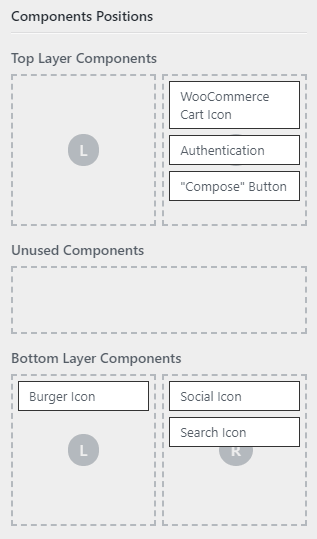 For admins convenience we have created Components Position in a way which is extremely easy to use and organize. Just drag and drop Unused Components which are in the middle in Top Layer Components L or R area on top or drag and drop in Bottom Layer Components L or R area at the bottom.
Other options
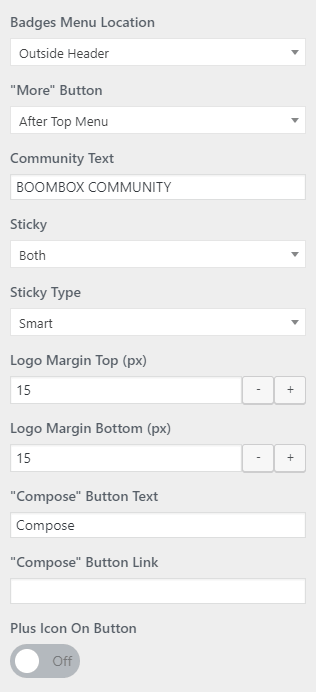
- Badges Menu Location
- From this menu set Badges Menu location Outside Header (Top Layer and Bottom Layer) or Inside Header or set as None. When Inside Header selected then Badges Menu appears in Unused Components, thus admin can set location of Badges menu from Components Position in Top Layer or Bottom Layer . When Badges Menu location set as None that means that Badges menu will be hidden from Header.
- “More” Button
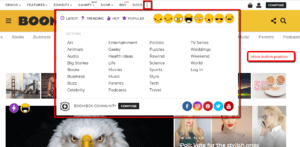
- In Boombox you can extend header and especially menu functionality by adding More Button which have pop-out menu with options to include many components. You can control position to set After Top Menu or Bottom Menu. You can add or remove elements in More button menu from Menus.
- Community Text
- This text is visible under the more button, just type in desirable text or leave blank.
- Sticky
- Choose which layer will be Sticky, Top Layer or Bottom Layer, or Both or None of the layers.
- Sticky Type
- choose to show sticky header in Classic mode (will always show) or in Smart mode (will only show on scrolling back to the top )
- Logo Margin Top (px)
- can change the space size around the logo against the header borders
- Logo Margin Bottom (px)
- can change the space size around the logo against the header borders
- “Compose” Button Text
- This field for changing text on Compose Button
- “Compose” Button Link
- This field for adding custom link on Compose Button. For example, you can add Zombify post creating page which will be yoursiteurl/frontend-page/
- Plus Icon On Button
- This icon can be On or Off with trigger.
Featured Labels #
This unique feature allow to use extra location for showing one of the existing menus.  Go to WordPress Customizer ▸ Design ▸ Header ▸ Featured Labels and first of all you need to set Visibility of the Posts Strip.
Visibility

Styling
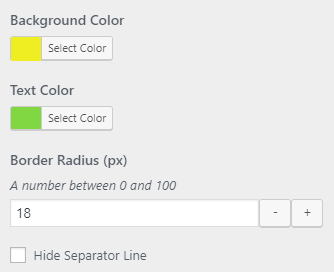 You can also find there settings for changing:
- Background Color
- Text Color
- Border Radius (px)
- Hide Separator Line
Posts Strip #
Posts Strip is a place where you can collect all the recent posts on top of the posts and pages. This is global option and this will affect everywhere on site. Despite that you can control Posts Strip on Archive pages, Specific Page and On global Single Posts. ![]() Go to WordPress Customizer ▸ Design ▸ Header ▸ Posts Strip and first of all you need to set Visibility of the Posts Strip.
Go to WordPress Customizer ▸ Design ▸ Header ▸ Posts Strip and first of all you need to set Visibility of the Posts Strip.
Visibility

Please note, that if you want to have different Posts Strips on Archive or Single Posts then you need to keep the checkbox for Visibility marked.
For setting up different Posts Strips then on Home page for: Archive – Go to WordPress Customizer ▸ Archive ▸ Posts Strips and change the dropdown value from Inherit to Custom. Single Post – Go to WordPress Customizer ▸ Single Post ▸ Posts Strips and change the dropdown value from Inherit to Custom. In WordPress Customizer ▸ Design ▸ Header ▸ Posts Strip you can control global settings for Post Strip such as Layout and Posts LoopLayout
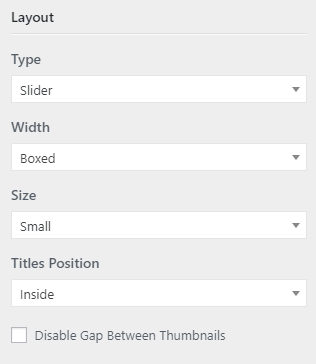
- Type
- Scrollbox / Slider
- Width
- Boxed / Full Width
- Size
- Small / Big
- Titles Position
- Inside / Outside
- Disable Gap Between Thumbnails
- Yes / No
Posts Loop
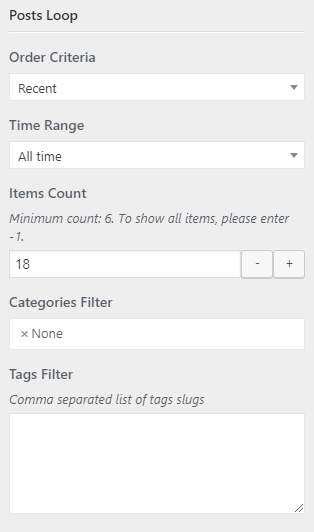
- Order Criteria
- Most Voted / Most Viewed / Most Discussed / Recent / Featured / Random / Most Shared
- Time Range
- Last 24 hours / Last 7 Days / Last 30 Days / All time
- Items Count
- Value which should be at least “6” or “-1” to show all posts
- Categories Filter
- add categories to show posts from specific categories
- Tags Filter
- add tags to show posts from specific tags
Color & Style #
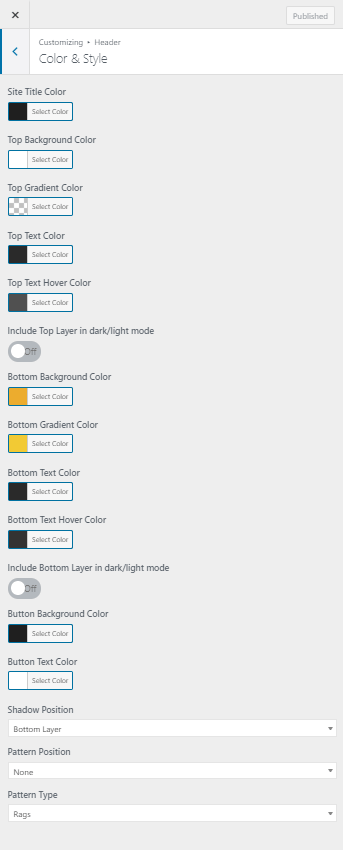
In this section you can control colors and styles for the Header. Here is what you can control and change:
- Site Title Color
- Top Background Color
- Top Gradient Color
- Top Text Color
- Top Text Hover Color
- Include Top Layer in dark/light mode
- Bottom Background Color
- Bottom Gradient Color
- Bottom Text Color
- Bottom Text Hover Color
- Include Bottom Layer in dark/light mode
- Button Background Color
- Button Text Color
- Shadow Position – Top Layer / Bottom Layer / None
- Pattern Position – Top Header / Bottom Header / None
- Pattern Type – Rags / Clouds
Typography #
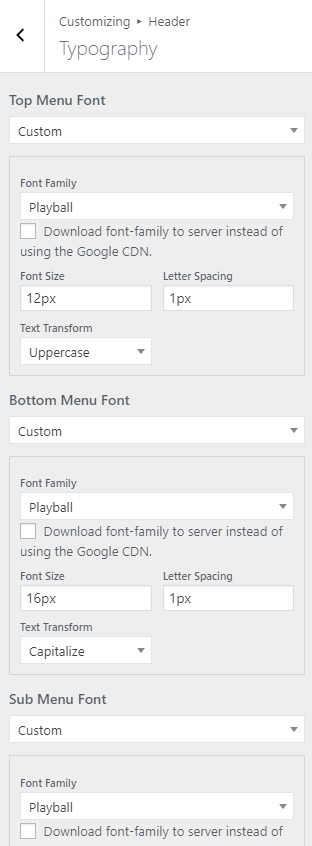
- Top Menu Font
- Inherit / Custom. If Inherit selected then using option set in WordPress Customizer ▸ Design ▸ Primary Font Family
- Bottom Menu Font
- Inherit / Custom. If Inherit selected then using option set in WordPress Customizer ▸ Design ▸ Primary Font Family
- Sub Menu Font
- Inherit / Custom. If Inherit selected then using option set in WordPress Customizer ▸ Design ▸ Primary Font Family

